
mspWebPay
Getting started
mspWebPay module is available in the MODX Simple Dream store.
To accept payments via WebPay, submit an application for registration in the system first.
You can get help with payment module integration through technical support or directly from the developer in Minsk.
WebPay setup
Important
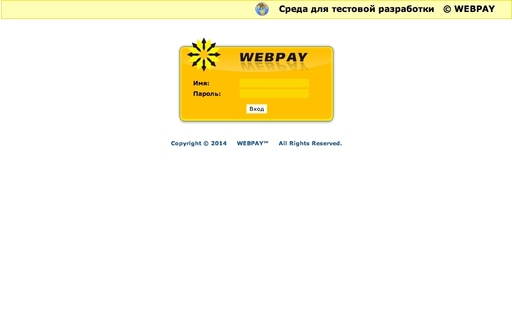
Use only the test environment to verify the payment mechanism.
You need the login and password issued after registration. Log in to the control panel and perform initial setup.
Billing ID is needed for component setup in MODX admin. Note it down. Fill the rest according to the form requirements.
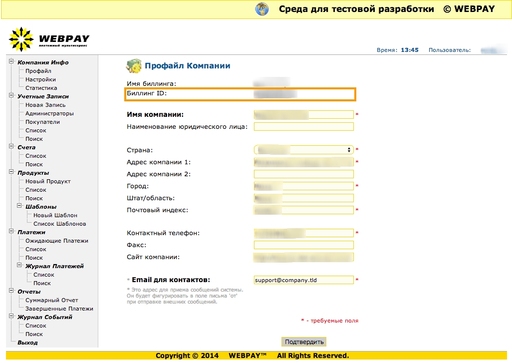
Configure the SMTP server for payment notifications to customers. Login and password are the same as the control panel.
You can also set the default payment site language (can be overridden in MODX).
Important — Secret key. Create a strong one and save it. Note it down, as it's needed for component setup in MODX admin.
Fill the rest as needed.

Basic WebPay setup is complete. For advanced panel settings, see the WebPay manual or contact WebPay support.
Package installation and setup in MODX
Enter credentials during installation to start working with WebPay in MODX.
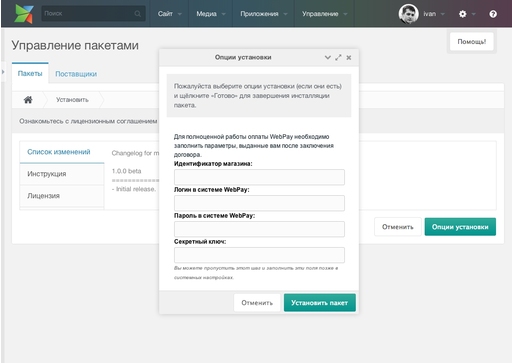
- Store identifier — the Billing ID you noted.
- WebPay login — from WebPay control panel, issued after registration.
- WebPay password — from WebPay control panel, issued after registration.
- Secret key — the complex key you created and saved in WebPay control panel.
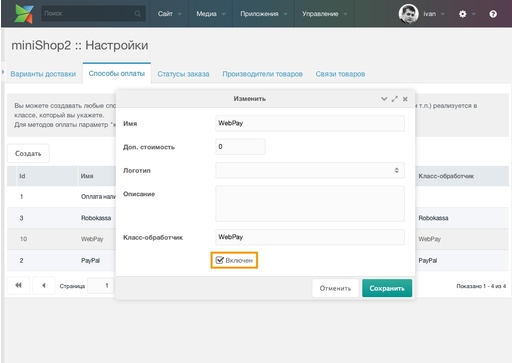
You can skip this step and fill in the data later in system settings. After installation, enable the payment method in miniShop2 settings and add it to the required delivery method.

To switch from test to production, change system setting ms2_payment_webpay_developer_mode from "Yes" to "No".

System settings reference
| Key | Name | Default | Description |
|---|---|---|---|
| ms2_payment_webpay_version | Payment form version | 2 | Version 2 is always used; no need to change |
| ms2_payment_webpay_login | WebPay login | Login issued at WebPay registration | |
| ms2_payment_webpay_password | WebPay password | Issued with the login. Both are used for payment verification requests. | |
| ms2_payment_webpay_secret_key | Secret key | Set in WebPay control panel. Used to sign payment requests and verify payments. Use a strong key. | |
| ms2_payment_webpay_store_id | Store identifier in WebPay | Your store ID. If wrong, payments go elsewhere. Always shown in WebPay panel. | |
| ms2_payment_webpay_currency | Payment currency | BYR | In test mode only Belarusian rubles. With a contract you can choose the currency and enter its ISO 4217 code. |
| ms2_payment_webpay_language | WebPay language | russian | WebPay supports Russian and English: russian or english |
| ms2_payment_webpay_checkout_url | Checkout URL | secure.webpay.by | URL where customers are sent for payment. Usually no change needed. |
| ms2_payment_webpay_gate_url | Payment verification URL | billing.webpay.by | URL for payment verification requests. Usually no change needed. |
| ms2_payment_webpay_developer_mode | Test payment mode | Yes | In this mode all requests go to WebPay test URLs. If disabled, payments run in production. Disable only after testing and after WebPay support confirms your store is in production. |
| ms2_payment_webpay_success_id | WebPay success page | 0 | Page to redirect after successful payment. Recommended: cart page. |
| ms2_payment_webpay_failure_id | WebPay failure page | 0 | Page to redirect after payment refusal. Recommended: cart page. |