
Example: Working with Widgets
When building a site you often need to make small changes: add or remove elements on a page. Here we show how to do this in the handyShop theme based on MagicThemes (and similarly in mtBlog).
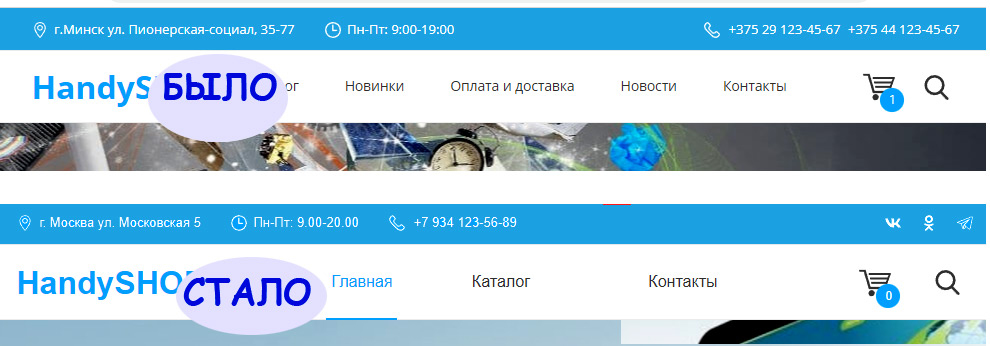
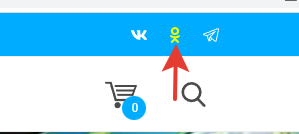
Typical cases: the site is ready but social links are not set up yet, or you want to see how social icons would look in the header vs footer.
- You can.
Fill in data in settings
First you need a list of social network links. For this example we use three: VK, OK, Telegram. Go to theme settings, open the Contacts and data tab.
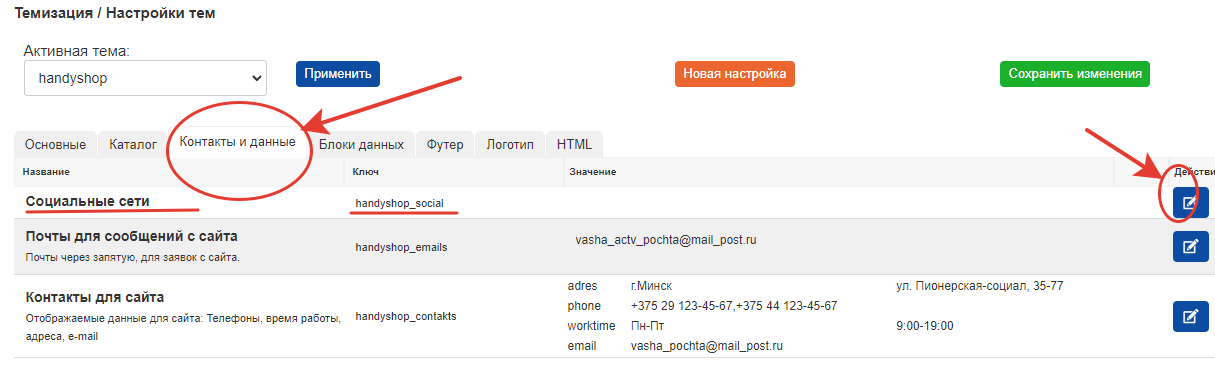
Next to Social networks click the edit icon (blue with pencil). The settings edit window opens. The theme already has a field for output. A few notes:
- Data type – MIGX. For this type you can choose a media source and a MIGX config. Here that is social networks.
- Only one level of nesting is supported.
To add data, click the green Add button and fill the new row. Click it 3 times and choose which networks to fill:
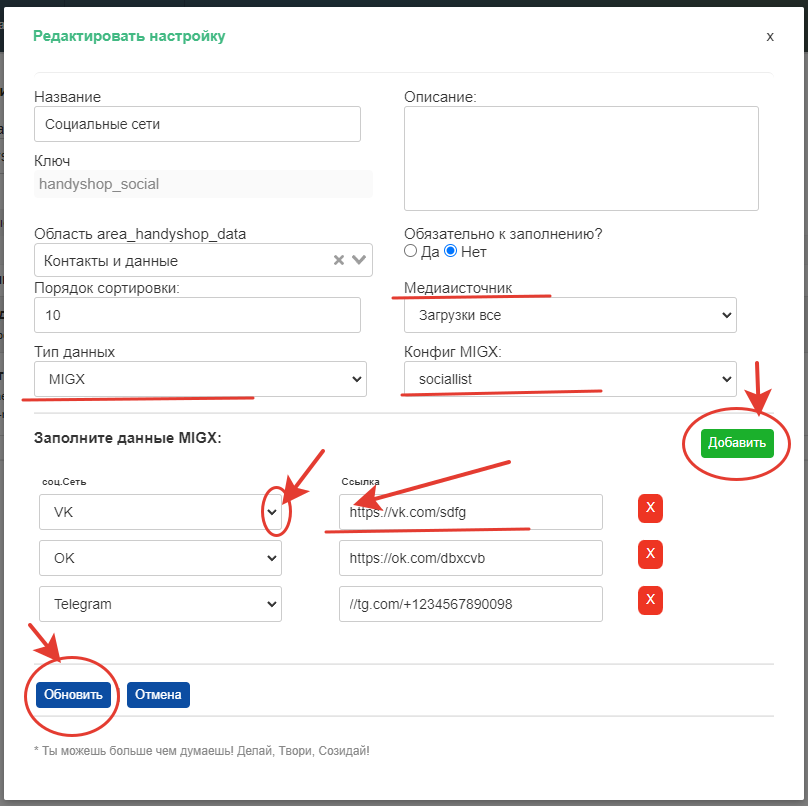
Fill the fields, then click Update. The table updates but is not saved yet. You can edit other tabs; when done, click Save changes. All changed fields are sent to the server and saved.
Saving is not immediate on purpose, to avoid accidental loss (e.g. closing the window or wrong data).
Now we need to decide where to show these icons.
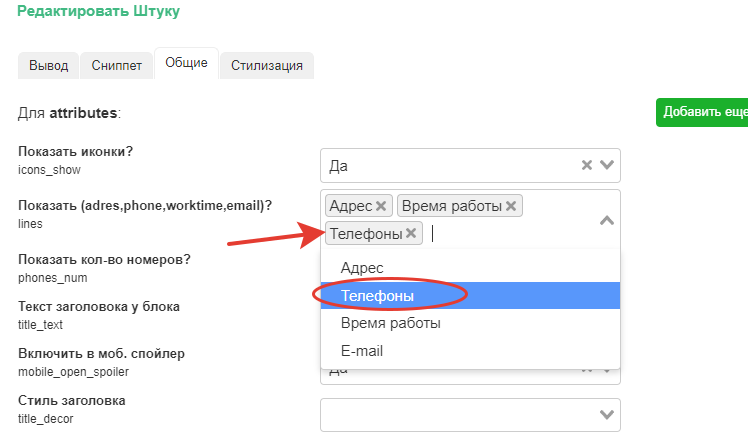
Choose areas and cells for insert/edit; change Widgets
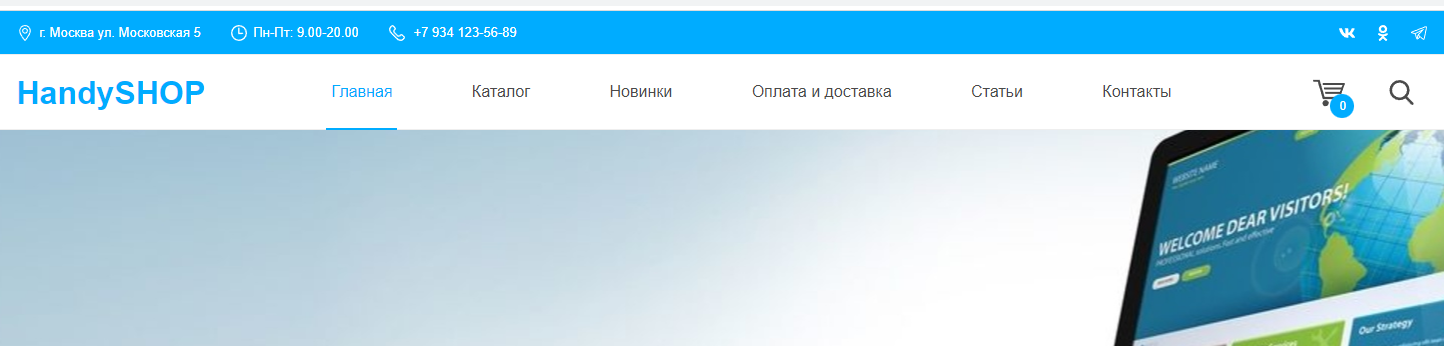
Example: show social icons instead of phones, and show one phone on the left (where opening hours are, desktop only):

Check areas and cells in the admin:

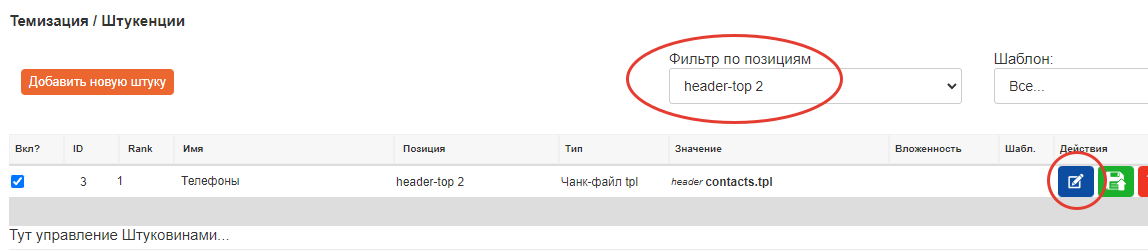
There are two cells: header-top1 and header-top2. Plan:
In header-top2 replace the contacts widget with the social networks widget.
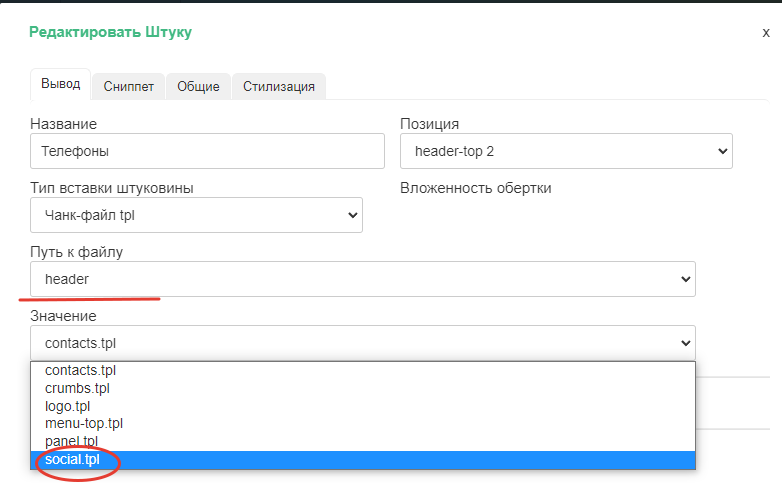
In header-top1 add a phone via a widget. Go to Packages → MagicThemes → Widgets, filter by position header-top2, click Edit.
Only change Path–Value. In Path choose the widget set folder; in Value choose the widget. The theme includes a social networks widget. Select it:
When you change a widget's Value, the previous widget's parameters remain. Many widgets share parameter names. You can revert the Value or keep some parameters. If you create a new Widget, only its parameters are shown.
Remove the old parameters with the red button if you do not need them.
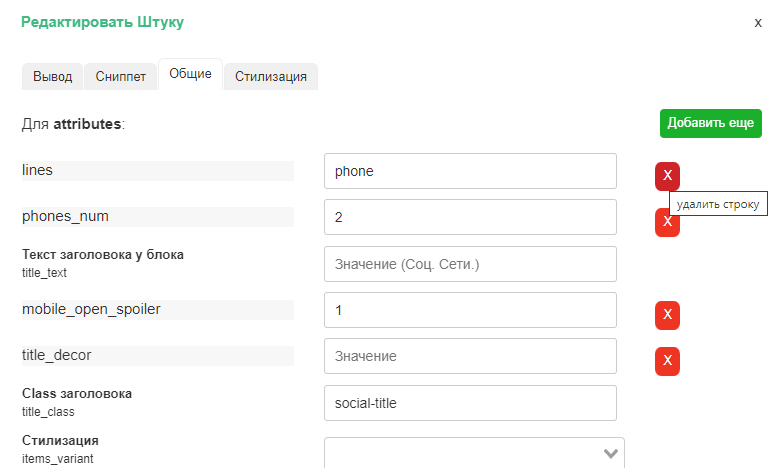
The Snippet tab is empty (this widget only uses theme settings). On General we only need Styling: 3 icon styles – Normal, in a square, in a circle. For a compact header choose Normal. Leave the title empty so it is not shown.
Open the Styling tab. Icon size is controlled by a multiplier (0 or 1 = default). You can set icon color. If color is empty, icons use their brand colors:
If you set a color, all icons use it. We'll use white and set a hover color for visibility.
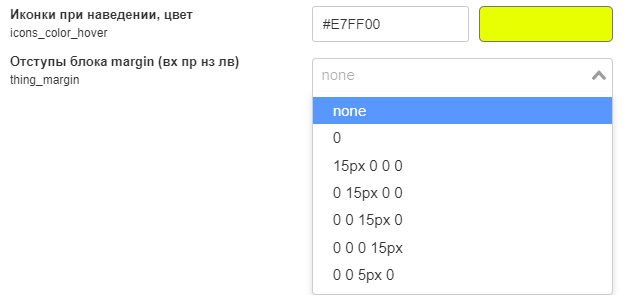
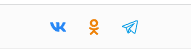
Below you can set margin for this widget (useful when several widgets share a cell). Click Update. Data is saved immediately. Clear cache if needed and check the site:
Now the phones. Edit the widget for header-top1, open General, add Phone.
You can reorder items by removing and re-adding. Set Number of phones to 1 to show only the first. Leave styling as is. Check the result on the site.
In this way you can add, change, and remove data and layout. For example, with a framed style for social icons:

You can adjust widgets in small steps without touching code.